Showing posts with label kids activities. Show all posts

Tuesday, June 17, 2014

Pinterest Review: Lego Cookies


We went to an outdoor movie night this past weekend to see The Lego Movie so I thought I would try out a version of the Lego cookies I've seen all over Pinterest with the goal of making the cookies in the simplest way possible.


Step One:  Ingredients - very simple!

 Step Two: Sort the M&Ms and color the frosting


 Step Three: Roll out the dough on wax paper with a rolling pin and some flour. Then I used a pizza cutter to cut out the different sized lego cookies.


Step Four: Place the lego cookies on an ungreased baking sheet. Bake at 350 for about 10 minutes because they are so small. Let them cool on a cookie rack for about 10 minutes.

Step Five: It's all fun and games until you have to frost them!!! These are tiny cookies and tiny M&M's...it took over an hour to frost and place the M&M's on the cookies. (Make sure you place the M&M pieces with the "M" face down - just an aesthetic thing!).

Step 6: Once frosted, I put the cookies into two Lego bin lids - I thought it was a cute way to present them!


My overall review of Lego Cookies: 

These are really cute and the perfect size for kids because they are small cookies. It was just the frosting process that was the real time consumer (although if you made your dough and your own frosting then you are definitely making a real project for yourself!!!).  My kids like helping me sort the M&M's and they were really excited to bring these to the movie!

Tuesday, May 6, 2014

Non-Lame Playdate: Upcycling Crafts


 I actually did these projects for a Brownie Meeting with an Earth Day theme, but I thought they would also work well for a fun play date.

I love the idea of "Upcycling" - someone's trash can indeed be someone else's treasure!

I found all of these ideas on Pinterest and they turned out to be pretty easy for a group of 8 year olds!!

Project 1: Tin Can Flower Pot/Pencil Holder/Vase


Materials:
Tin cans (I had all different sizes to choose from)
Burlap 
Twine
Ribbon 
Glue or Spray Adhesive (I used the spray adhesive in the interest of time although an aerosol can did not really fit my Earth Day theme!!)
Directions:
  • I precut the burlap ahead of time and placed in the tin cans because I had a group of 10 girls and I wanted to make sure I had enough! It also made the process a little smoother to have this part done. 
  • Spray the burlap with adhesive. 
  • Line up the bottom of the burlap with the base of the tin can and wrap the burlap around the can. 
  • Measure a piece of ribbon so it fits around the can. I bought a few ribbons for the girls to choose from so they had some unique looks. I also told them they could place the ribbon where they felt it looked best - secure the ribbon with glue or spray adhesive. 
  • Lastly, measure and tie a piece of twine around the ribbon.

You could also collect or have them bring upcycled items to design their new can like buttons, artificial flowers, lace, etc. It is always fun to let them really design their own unique look!!! 

Project 2: Pop Top Bracelet 

Materials:
Pop Tabs (about 12 for each)
Ribbon - One 12 inch piece per bracelet

Directions: 
  • Since I did this as a group activity, I found it easiest to make this as a "Ready to Craft" kit. Along with the pop tabs and pre-cut ribbon, I put the instructions into each baggie so that they could do this project again on their own and there are more complicated ways to make these too. 
  • Weave the ribbon through the first pop tab and tie a knot, leaving enough ribbon to tie at the end.
  • For the rest of the bracelet, we did the simplest bracelet design which is just weaving the ribbon through the pop tab holes - make sure the pop tabs are going in the same direction.
  • For the last pop tab, I had the girls tie the end of the ribbon with the remaining ribbon from their first knot. You could also get a simple toggle in the jewelry department.

Project 3: Word search!

If you are doing this for a Girl Scout Troop or school group, I also found this lesson planwhich had some great activities. I printed out the word search and gave it to the girls that finished first so they were occupied while the others finished up. (Any teachers or troop leaders know why this is a very important back up plan!!!).

Department of Energy K-5 Lesson Plans


Snack: Edible Bird's Nest  

I thought this was a cute Earth Day themed snack!! I had seen it around Easter time.

Ingredients: 
5 cups Rice Krispies
40 large marshmallows
1/4 cup Margarine
1/2 cup chocolate chips
Yogurt Covered Cranberries (3 per nest)

Directions:
  • Spray muffin tins with Pam, set aside
  • Melt the butter in a large pot
  • Add marshmallows and stir until mixed
  • Remove from heat and add the Rice Krispies and chocolate chips, stir until mixed
  • Fill muffin tins with mix
  • Use a spoon or melon baller to shape each one into a "nest"
  • Let cool 
  • Once cool, remove "nests" from muffin tin and place on a platter. 
  • Add yogurt covered cranberries to each nest


Monday, April 28, 2014

Fun Food Ideas: DIY Celebration Waffle Bar


My kids LOVE to have breakfast for dinner (Brinner) and I found that a DIY Waffle Bar complete with Shirley Temples in fun champagne flutes made for a great celebration dinner (birthdays, end of school year, New Year's, etc!).

Disclaimer: In my quest for fun but healthy options, this one is fun but falls within the "in moderation" category for nutrition!!  :o)

Here is what you need:

Waffles!! You know that Waffle Iron you got as a wedding gift?! Dust it off!!
Lots of fun toppings - fruit, marshmallows, whipped cream, chocolate chips, etc. I also put blueberry pie filling in a small crock pot so it was warm.
Last but not least, don't forget the different flavored syrups!!


Wednesday, April 23, 2014

Fun Food Ideas: Easy Bunny Face Breakfast

If you are looking for a cute and easy way to greet your kids on Easter morning, try this bunny breakfast!!! Here is what you need:

- Frozen Waffles (I used one regular and one mini waffle, but you can probably cut out a smaller circle from another regular waffle).

- Cool whip

- Cantaloupe slice cut in half for the ears

- Blueberry eyes

- Tip of a Strawberry for nose

- Julienned cantaloupe for the whiskers


**** Here's a tip I learned after my first Bunny Waffle, do the cool whip and blueberry eyes last because the warmth of the waffle will make the cool whip a little runny! 


Happy Easter!!!!! 

Friday, February 14, 2014

Fun Food Ideas: Love Note Breakfast

I thought it would be fun to surprise my family with a Valentine's Breakfast this year and to add some fun and creative touches while I was at it!! My husband thinks I've gone a little over the top - maybe I have...but the one thing I have found about motherhood is that I love finding new ways to add fun memories and experiences that hopefully they will cherish years from now. (And I think my husband will too!).

The kids loved the quirky "love notes" on the menu items and of course, were ecstatic to have sweets for breakfast!!  So, if you are looking for something fun to surprise your family with, here is my Valentine's Day Love Note Breakfast (which can be easily modified for anniversary, birthday, etc)!!


"I'm so EGG-cited to be your Valentine"

I made one big omelet in a skillet and then used a heart shaped cookie cutter to make them into the holiday appropriate shape.


You DONUT know how much you are loved!

It must be a holiday if Mom is serving donut holes for breakfast!!!


You are BERRY special!

What would Valentines Day be without strawberries?! Plus they counteracted the donut holes!!


You're my #1 stud MUFFIN!

For the hubby...just in case he didn't know he was loved!! The best part was my daughter asking what a "stud muffin" was and me telling her that it meant Daddy was handsome....she is 8 so she instantly retorted with "EIWWWWWW!".


"I love you a LATTE!" 

Ok...it was just regular coffee, but it still works, right?


"You MELT my heart!" 

Another "is Mom feeling OK??" kind of treat - marshmallow Peeps hearts for their hot chocolate?! I know that some people make their own marshmallows - I did mention that my husband already thinks I went over the top on this, right??


"ORANGE you glad to be my Valentine?"

Of course this one prompted a series of knock knock jokes....


All in all, it was a fun way to start the morning and provided me with another chance to say "I love you!".


Thursday, January 23, 2014

DIY Disney Autograph Books


We are taking our first family trip to Disney World this year - which means everyone gives you advice on what you should bring and do!! One of the suggestions was to get the kids their own autograph books for Mickey, Minnie and everyone to sign while we are there.

I looked them up online through Disney and they were cute, but I wanted something a little more personal for the kids (also with their names on it since it will be inevitable that they will argue or which one is theirs!!).

Off to Joanne Fabrics I went to get my supplies:

1) Photo Books ($0.97 each)


2) Disney Scrap Book paper (one for each - $0.99 ea)


3) Mouse Ear Letter Stickers ($4.99 in the scrap book section - they had a whole Disney scrap book aisle!!)

4) Sharpie (have the characters sign the plastic pages -  some characters have big hands and little pens are hard for them to hold!)


I replaced the photo book cover  (front and back) with the scrap book paper and then added their names with the mouse ear stickers - I luckily only needed one package of letters for all three books.

Besides the personalized touch, I like that the books have a plastic cover in case they get wet. I plan to add pictures of the kids with the character so they have a full memory book in the end!

I also got 2 packs of Disney stickers to add after, so in total, I spent about $16 which is a little less than if I had purchased them online...but I like these much more!!!

Tuesday, December 3, 2013

23 Creative (Yet Simple!) Elf on the Shelf Ideas

I know not everyone is an EOTS fan, so for those of you that find it cute, funny, interesting, etc to see what our Elf Jingle has been up to this year.....here is your one stop shop!!


Day 1: Making her list and checking it twice!!!


Day 2: Sledding fun with some friends!


Day 3: Jingle "brushes up" on her art!


Day 4: Kicking It with her Rockettes!!


Day 5: Feeling the Hockey Spirit!


Day 6: Rescue Elf!


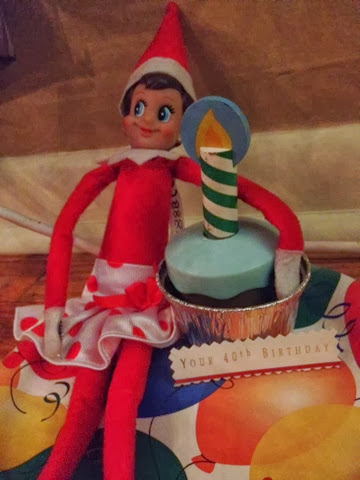
Day 7: Happy 40th Birthday to Doug!


Day 8: Jingle Boogie!


Day 9: Jingle "whooping" it up!

Day 10: Working Hard!


Day 11: Ahoy!!! But in the treasure box was a note for the kids with "Missions of Kindness" that they had to complete before Christmas. I wanted a way to have my children experience giving in the holiday season, not just focusing so much on the getting.


Day 12:  Say Cheese!


Day 13: Slumber Party with a new Christmas DVD!


Day 14: Submitting her report to Santa


Day 15: Housework is exhausting!


Day 16: Catching up with a friend...although my daughter pointed out that a snowman probably shouldn't be drinking HOT chocolate!!


Day 17: Catching the candy thief!


Day 18: Stealing a banana from a Minion


Day 19: Jingle in a snow globe? Not my best...in my defense I was on Tylenol Cold PM!!!


Day 20: In the meadow she can build a snowman!


Day 21: Snake Eye!!!


Day 22: Lights on the Lake


Day 23: Jingle brings presents to friends and wishes them a Merry Christmas!!!